
Finally, you have developed a great business website! But do you really know how to track its performance in Google? This is where creating a Google Search Console account comes into play!
The objective of this blog post is to let you know about Google Search Console (GSC) and how to set up for your website.
What is Google Search Console? Explained
The Google Search Console is a tool powered by Google and helps website owners assess their performance on Google Search and optimize their site’s visibility for more relevant search traffic. It will notify you via email if it discovers any new problems with your website. The Search Console can view Google’s crawling, indexing, and serving of webpages. Website owners can use this to track and improve search results.
You do not have to log in to the tool every day. To ensure the data is stable, you should check your account once a month or whenever you change the site’s content. Find out more about using the Google Search Console to manage your website.
Note: If you are already using GSC and want to fix common errors on your website. Check out our article How to Fix Crawl Errors in Google Search Console and improve your website performance.
What Makes Search Console Useful?
The Google Search Console helps in the optimization, update, and monitoring of your website’s performance in Google. Most people use GSC mainly to see impressions and clicks.
For example, it can identify traffic-generating search terms, and page rankings, find and use backlinks to increase link juice, find errors that need to be fixed, and check if a hack has occurred on the website.
How to Create a Google Search Console Account
Now, let’s start the process of creating a Google Search Console account step by step:
Step 1: Use your Google account to log into the Search Console
To set up a search console using this method, you must have a Google account. It is also free, so do not worry.
You can log in with the same credentials if you already have Gmail, Adwords, or Google Analytics.
Step 2: Enter your Website’s Domain Name (or URL prefix) to Add a Property
- After logging in, you can add a property type using your domain or a URL prefix.
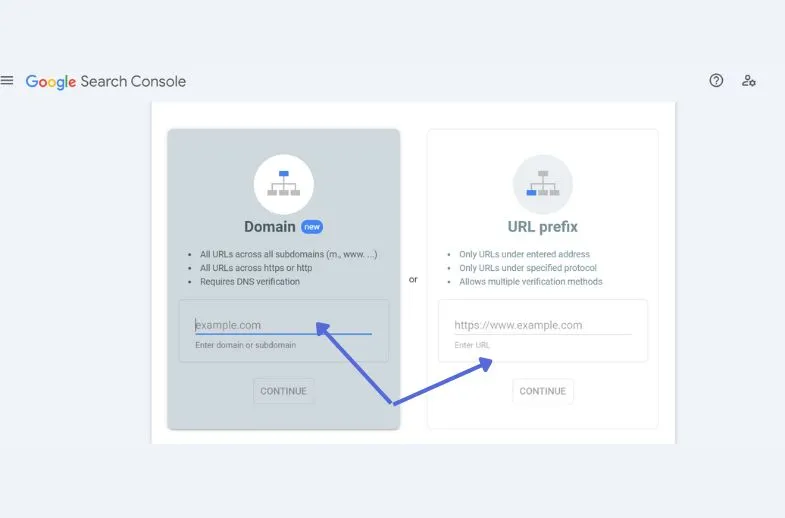
When you set up Search Console using the “Domain” option, your account is created at the domain level. In other words, you are generating a single property that contains every subdomain and protocol prefix connected to your domain.
To put it another way, this feature links every part of your website to it. The next step to configure it with a domain-level property is to type the root domain of your website in the entry field and click “Continue.” By choosing “URL-prefix,” a URL-prefix property is configured.
Step 3: Verify Your Website
To use this account and collect data, you must verify that you own your website.
Verification of a Domain Property: Your DNS provider (or domain name, if possible, stem provider) can only verify a domain-level property.
First, check to see if the company you paid to use the domain, or Domain Name System (DNS) provider, is included in the dropdown menu:
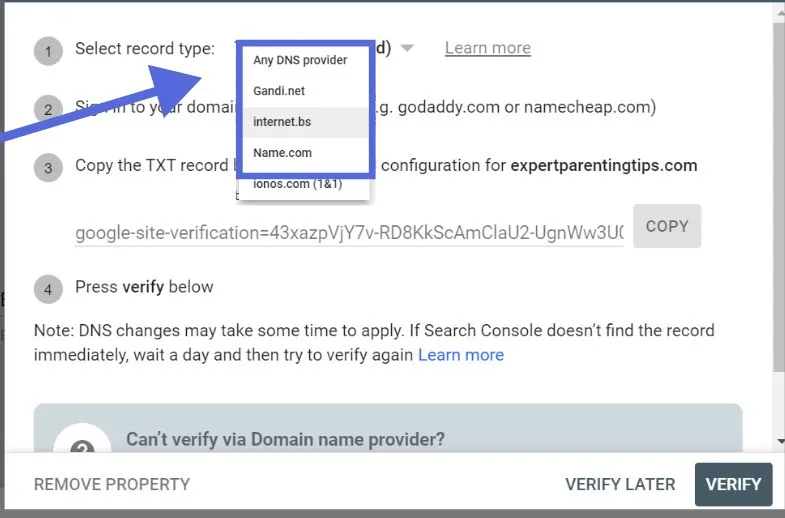
It will indicate thorough instructions for the provider. If you would like to include it in your strategy for digital advertising, talk to your DNS developer. But if there is no provider, click ” Any DNS provider.”
Following the copying process, log in to your domain registrar’s website in a new tab. Navigate to the domains you own and select the one you want to configure. Find the option to manage your DNS records. This will vary depending on where your provider’s site is located.
Look for any mention of “DNS” and select it.
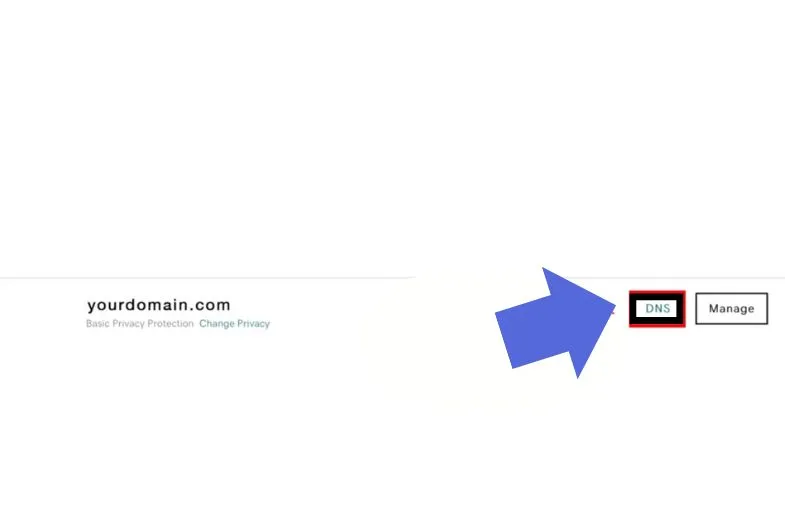
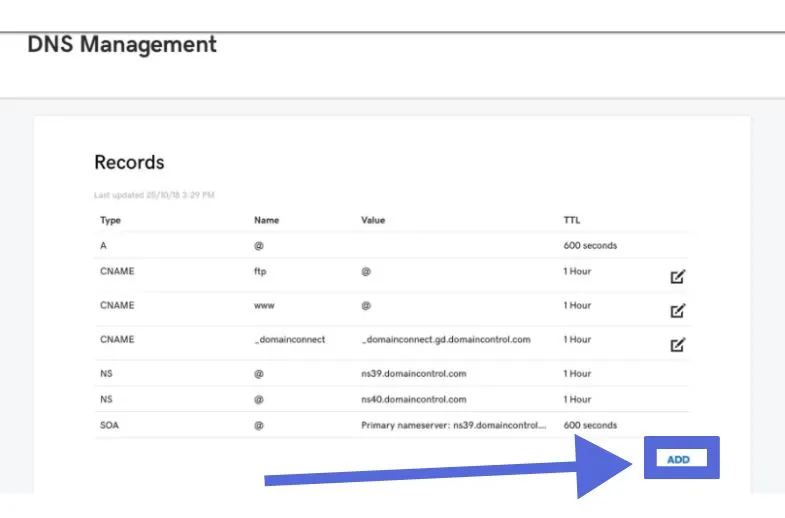
You will then be taken to the Domain Management screen to see a list of your DNS records.
To create a new one, select “Add.”
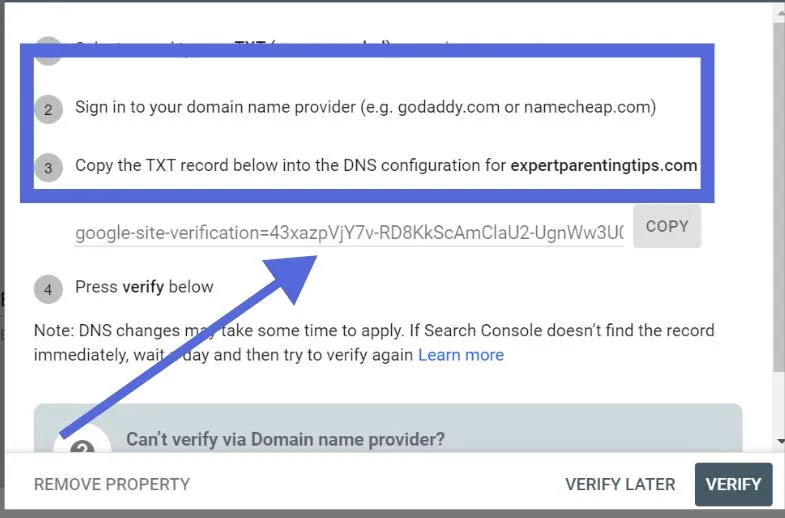
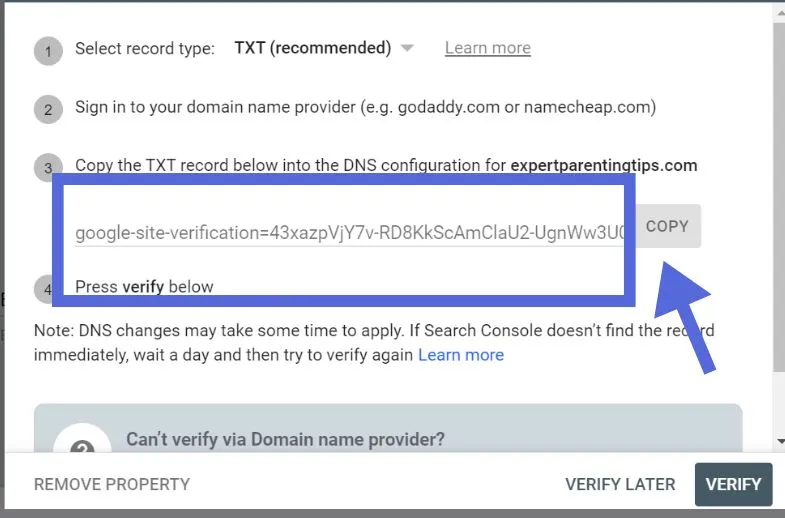
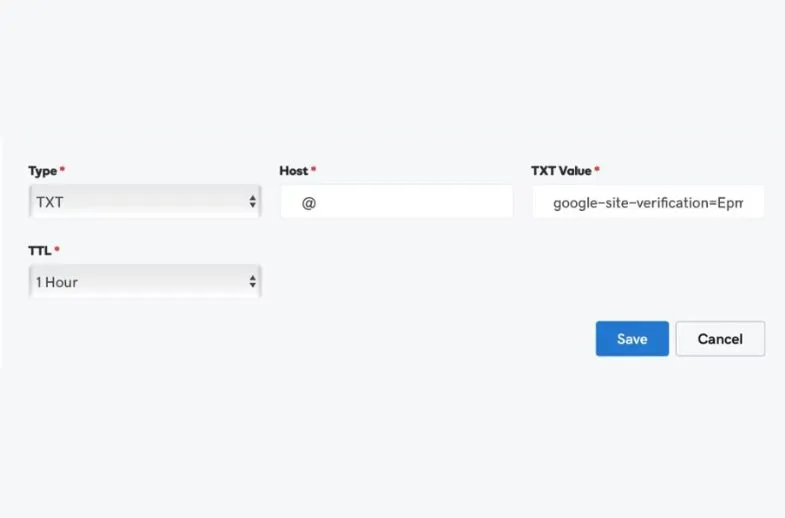
Under “Host,” select “Type” and then “Text.” Type the @ symbol. Leave “TTL” at one hour. Most importantly, paste the TXT record from Google into the “TXT Value” field. Then click “Save.”
Return to Google Search Console, add your TXT record, and click “Verify.”
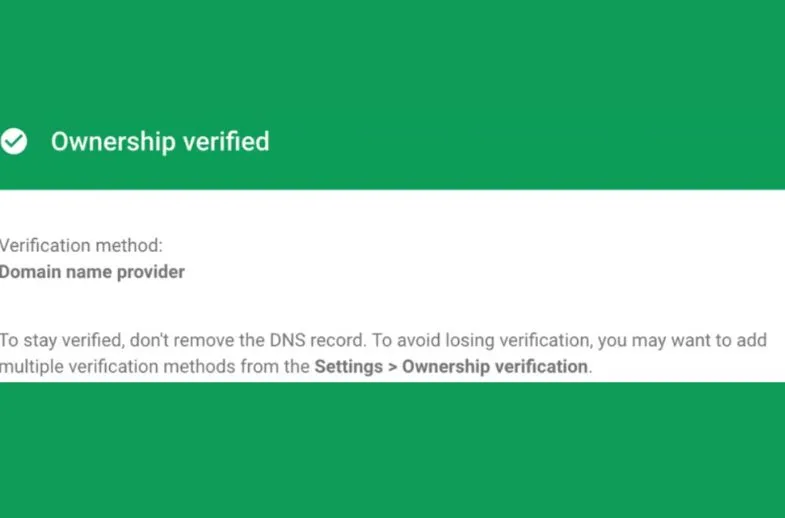
Remember that changing DNS records can take up to 72 hours. If your ownership is not verified immediately, please return in a few hours or the next day and check again.
Verification of a URL-prefix property: If you do not access your domain registrar or do not want to modify your DNS logs, you can set up a property called URL-prefix. This provides numerous verification options.
Google suggests that you verify using an HTML document. Keep in mind that this is only for URL-prefix-related values. Finally, they recommend that you register a domain. There is a way to confirm the name of your domain with your hosting company, which we demonstrated overhead. Using that approach, however, may result in the creation of a domain-level property. Here’s how to confirm with the alternative techniques.
1. HTML File: For this method, upload an HTML file to your website’s root folder. It is simple, but you must connect to your server via FTP or a cPanel File Manager. If you are unfamiliar, do not try to verify using this method.
If you are familiar with working with your website’s server, here’s how to verify using an HTML file.
- Download the Google-provided file.
- Access your website’s root directory.
- Upload the file.
- Go back to the search console and select “Verify.”
2. HTML Tag: To verify using the HTML tag, add a meta tag to your site’s <head> section. You will need developer access to your site’s content management system. We will take WordPress as an example.
Here’s how to add the GSC HTML tag to WordPress using a plugin:
- Make a copy of the tag.
- In a new tab, open the WordPress admin panel for your website.
- Install the Insert Headers and Footers plugin on your website.
- Navigate to Settings > Insert Headers and Footers.
- Insert the Search Console meta tag into the “Scripts in Header” field.
- Go back to the Search Console and select “Verify.”
3. Google Analytics: If you already have a Google Analytics account and have installed a tracking code on your website, you can begin using Search Console by verifying a user-prefix property. Access the Google Analytics verification box in the Search Console, as shown below, and then select “Verify.”
4. Google Tag Manager: If you have previously used Google Tag Manager, you can verify with a single click, similar to the Google Analytics method. In Google Search Console, click the Google Tag Verification box and choose “Verify.”
Step 4: Get Your Site Submitted
You now understand how to implement Google’s Search Console on your website. In your search console, select Sitemaps from the left-side menu.
Here, you can enter the URI for your sitemap’s location. Google can take note of the submitted URLs immediately, and within a few days, your URLs should be mostly crawled and indexed!
How to Use Google Search Console
Follow these considerable steps:
- Check site ownership: The console provides access to all available information. Find out how to verify your website’s ownership.
- Ensure Google can find and read your pages: The index coverage report overviews all pages indexed or attempted to be indexed on your website. Examine the list and try to fix any page errors or warnings.
- Submit a sitemap through the Search Console: Google can discover pages from your website without requiring this step. However, submitting a sitemap through the Search Console may speed up your site’s discovery. If you submit it through the tool, you can track its status. Discover more about the Sitemaps report.
- Keep track of how your website performs: The search performance report displays the traffic you receive from Google Search and breaks it down by queries, pages, and countries. Each breakdown reveals trends in impressions, clicks, and other metrics. If your traffic is decreasing, consider debugging the problem, which will help you prioritize your efforts.
Final Thoughts
Once configured properly, Google Search Console offers powerful features to improve your website’s visibility. These include monitoring impressions and clicks, identifying traffic-generating keywords, checking page rankings, and uncovering valuable backlinks.
It also helps you detect and fix errors, ensuring your site remains healthy and secure from hacksers. Regularly checking it, especially after changing your site’s content, helps maintain stable and optimized performance.